Welcome to the Husqvarna Sewing Machine Instruction Manual, your essential guide to understanding and optimizing your machine’s features, troubleshooting, and maintenance for optimal sewing experiences.
Overview of the Husqvarna Sewing Machine
The Husqvarna sewing machine is a versatile and high-quality appliance designed for both beginner and advanced sewists. Known for its durability and innovative features, it offers a wide range of stitch options, including decorative and utility stitches, and advanced functions like one-step buttonholes. Models such as the Opal 690 Q and 770 QE are popular for their user-friendly interfaces and robust performance. The machine also features adjustable presser foot pressure, allowing seamless work with various fabric types, from lightweight sheers to heavy materials. With a stainless steel bedplate, fabrics glide smoothly, ensuring precise stitching. Husqvarna sewing machines are supported by extensive resources, including manuals, online communities, and customer service, making them a reliable choice for sewing enthusiasts.
Importance of the Instruction Manual
The instruction manual is a crucial resource for mastering your Husqvarna sewing machine. It provides detailed guidance on machine setup, operation, and maintenance, ensuring optimal performance. Whether you’re a beginner or an experienced sewist, the manual helps you unlock the machine’s full potential, from basic stitches to advanced features like one-step buttonholes and embroidery units. It also serves as a troubleshooting guide, addressing common issues like thread jamming and tension problems. Regular maintenance schedules and safety precautions are outlined to prolong the machine’s lifespan. Accessing the manual online or through customer support ensures you always have the information needed to resolve issues and enhance your sewing experience.
Understanding the Components of the Husqvarna Sewing Machine
The manual guides you through identifying and utilizing key components like the stitch selector, bobbin, and presser foot, ensuring you understand their roles for effective sewing.
Key Parts and Accessories
Familiarizing yourself with the Husqvarna sewing machine’s key parts and accessories is crucial for optimal performance. Essential components include the stitch selector, bobbin, and presser foot, each serving specific functions. Accessories like embroidery units, various presser feet, and extension tables enhance versatility. The machine also features a one-step buttonhole creator and adjustable presser foot pressure, catering to diverse fabric types. Understanding these elements ensures you can harness the machine’s full potential, whether sewing delicate fabrics or heavy-duty materials. Proper use of these parts and accessories is detailed in the manual, guiding you to achieve professional-grade results in your projects.
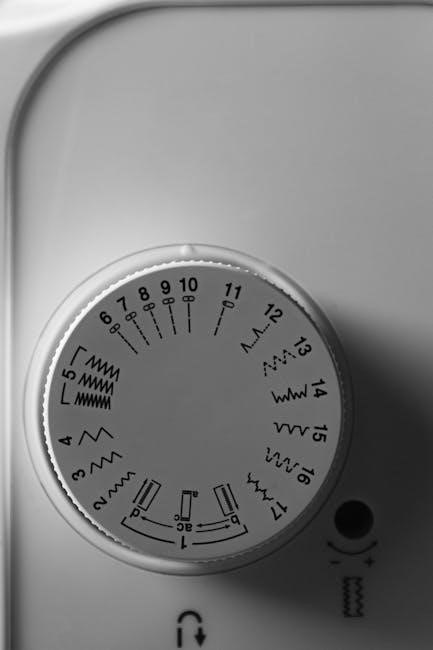
Understanding the Stitch Selection
The Husqvarna sewing machine offers a wide range of stitch options, from basic straight and zigzag stitches to decorative and specialized patterns. Understanding the stitch selection is key to achieving desired results for various fabrics and projects. The machine features a one-step buttonhole function, ensuring consistent and professional-looking buttonholes. Additionally, adjustable stitch length and width allow for customization based on fabric type and sewing needs. The manual provides detailed guidance on selecting the right stitch for different materials, enabling users to explore creative possibilities while maintaining precision and quality in their sewing projects.
Setting Up Your Husqvarna Sewing Machine
Unpack and prepare your Husqvarna sewing machine by following the manual’s initial setup guide; Ensure proper placement on a stable surface and refer to the manual for threading and bobbin installation.
Unpacking and Initial Setup
When unpacking your Husqvarna sewing machine, carefully remove all contents from the box and inspect for any damage. Ensure all accessories, such as the power cord, presser feet, and bobbins, are included. Place the machine on a stable, flat surface in a well-lit area. Before plugging in the power cord, refer to the manual for specific setup instructions tailored to your model. Familiarize yourself with the machine’s layout, including the stitch selector, tension dials, and presser foot mechanism. If your model includes an embroidery unit, attach it according to the manual’s guidance. Proper initial setup ensures smooth operation and prevents potential issues down the line.
Threading the Machine
Threading your Husqvarna sewing machine is a straightforward process when done correctly. Begin by placing the spool of thread on the spool pin and pull the thread through the machine’s tension discs. Gently guide the thread through the take-up lever, ensuring it is seated properly. Next, pass the thread through the channel and into the needle’s eye. Use the manual’s diagrams to verify the correct threading path for your specific model. Avoid pulling the thread too tightly, as this can cause tension issues. Once threaded, test the machine by sewing a few stitches to ensure smooth operation. Proper threading is essential for consistent stitching and preventing thread breakage.
Bobbin Installation and Tension Adjustment
Installing the bobbin correctly is crucial for smooth sewing. Place the bobbin in the bobbin case, ensuring the thread pulls evenly through the slot. Guide the thread through the machine’s tension spring and gently pull to seat it. For models like the 770 QE, check the take-up lever spring to avoid thread slippage. Adjust the bobbin tension by turning the small screw on the case, testing with scrap fabric to ensure balanced stitches. If the upper thread tension needs adjustment, refer to your manual for specific guidance. Proper tension prevents thread breakage and ensures consistent stitching quality. Always test adjustments on scrap fabric before starting your project.

Basic Operations and Functions
Mastering basic operations ensures smooth sewing. Start with threading, stitch selection, and presser foot use. Adjust stitch length and width for precise results. Explore essential features for versatility and ease.
Starting Your First Sewing Project
Begin by familiarizing yourself with the machine’s components and settings. Choose a simple fabric like cotton for practice. Thread the machine correctly, ensuring the bobbin is properly installed. Select a basic straight stitch and adjust the stitch length and width as needed. Place a scrap piece of fabric under the presser foot to test your settings. Start sewing slowly, guiding the fabric smoothly. Practice backstitching at the beginning and end for secure seams. Refer to the manual for troubleshooting common issues like thread jamming or uneven stitches. Join online communities for additional tips and support to enhance your sewing experience.
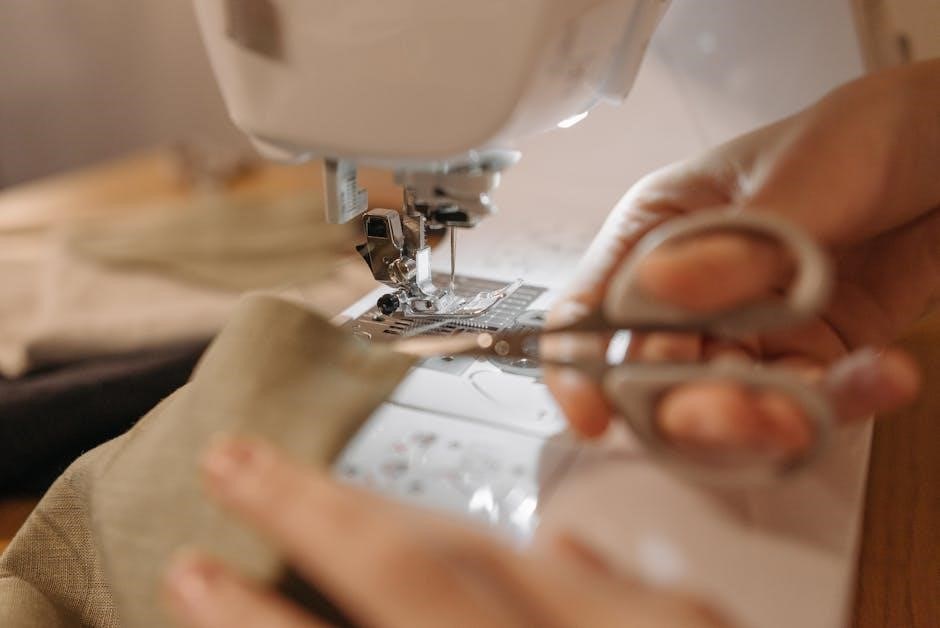
Using the Presser Foot
The presser foot is a crucial accessory for maintaining fabric control during sewing. Start by attaching the correct foot for your project, such as the all-purpose foot for general sewing or the zipper foot for precision. Ensure the foot is securely snapped on to prevent fabric slippage. Adjust the presser foot pressure if needed, especially for lightweight or delicate materials. Guide the fabric smoothly under the foot, keeping it aligned with the edge. This ensures even stitching and prevents bunching. For specialized tasks, explore additional feet like the embroidery or quilting foot. Always refer to the manual for specific foot compatibility and usage tips.
Adjusting the Stitch Length and Width
Adjusting the stitch length and width on your Husqvarna sewing machine ensures precise control over your sewing projects. Use the stitch length dial or button to set the desired length, typically between 0.5mm to 5mm, depending on fabric type. The stitch width adjustment, available on select models, allows you to customize the stitch’s span, ideal for decorative or heavy-duty sewing. Always test settings on scrap fabric before sewing your final piece. Proper adjustment ensures even stitching, prevents fabric stretching, and enhances the overall quality of your work. Refer to your manual for model-specific guidelines on adjusting these settings effectively.
Advanced Features of the Husqvarna Sewing Machine
Explore advanced features like one-step buttonholes, adjustable presser foot pressure, and embroidery units, designed to enhance your sewing experience and deliver professional-quality results effortlessly.
Understanding the One-Step Buttonhole
The one-step buttonhole feature on your Husqvarna sewing machine simplifies the process of creating professional-looking buttonholes. This advanced function allows you to sew a buttonhole in a single step without manually adjusting settings.
To use this feature, select the one-step buttonhole option from the stitch menu. The machine will automatically measure and sew the buttonhole to the correct size, ensuring consistent results every time.
This feature is ideal for beginners and experienced sewists alike, as it eliminates guesswork and ensures precision. It works well with various fabric types and can be customized to accommodate different button sizes for a perfect fit.
Using the Embroidery Unit
The embroidery unit is a versatile accessory for your Husqvarna sewing machine, enabling you to create intricate designs and patterns with ease. To use it, attach the unit securely to the machine following the manual’s alignment guide to ensure proper installation.
Select embroidery designs using the machine’s interface or import custom designs via USB for personalized projects. Always stabilize fabric with appropriate materials to prevent distortion during embroidery.
Practice on scrap fabric to familiarize yourself with the unit’s operation and achieve optimal results. Refer to your specific model’s manual for detailed instructions, as features may vary.
Adjustable Presser Foot Pressure
The adjustable presser foot pressure on your Husqvarna sewing machine allows for precise control when working with various fabric types. This feature ensures even feeding, preventing fabric from slipping or puckering during sewing.
Lightweight fabrics like sheers benefit from reduced pressure, while heavier materials require increased tension for smooth operation. Adjust the pressure using the designated dial or button, ensuring optimal results for your sewing projects. Always refer to your machine’s manual for specific guidance on pressure adjustment to maximize performance and versatility.
Troubleshooting Common Issues
Identify and resolve issues like thread jams, tension problems, or error codes by referring to the manual’s troubleshooting guide for quick solutions and optimal machine performance.
Thread Jamming and Breakage
Thread jams and breakage are common issues that can disrupt your sewing flow. These problems often arise from incorrect threading, tangled bobbin threads, or debris in the machine. To resolve jams, turn off the machine, gently remove the jammed thread, and clean the area. For breakage, check the thread quality and ensure proper tension. If the issue persists, consult the manual for specific troubleshooting steps or refer to online resources for detailed guidance. Regular maintenance, like cleaning and oiling, can also prevent such issues. Always follow the manufacturer’s recommendations for thread type and usage to minimize disruptions and ensure smooth sewing operations.
Tension Problems
Tension issues are a frequent challenge for sewists, leading to uneven stitches or fabric puckering. These problems often stem from incorrect thread tension settings or improper bobbin installation. To address this, start by checking the upper thread tension dial and ensure it is set appropriately for your fabric type. If the bobbin tension is too tight or loose, gently adjust it according to the manual’s guidance. Regularly cleaning the machine’s tension discs and ensuring the thread path is clear can also resolve such issues. For persistent problems, refer to the troubleshooting section or consult online resources for model-specific solutions to restore balanced tension and achieve professional-looking results.
Machine Error Codes and Solutions
Machine error codes on your Husqvarna sewing machine are designed to help identify and resolve issues quickly. Common codes include errors related to thread jamming, bobbin problems, or mechanical malfunctions. For example, an “E1” error may indicate a threading issue, while “E3” could signal a bobbin tension problem. To address these, refer to the manual for specific code meanings and solutions. Gently clearing thread jams, rethreading, or adjusting tension settings often resolves the issue. If persistent, resetting the machine or consulting online troubleshooting guides can help. Always ensure your machine is properly maintained to minimize error occurrences and maintain smooth operation.
Maintenance and Care
Regular maintenance ensures optimal performance of your Husqvarna sewing machine. Clean the machine, oil moving parts, and check for dust and debris. Schedule maintenance every 6 months;
Cleaning the Machine
Cleaning your Husqvarna sewing machine is essential for maintaining its performance and longevity. Use a soft, dry cloth to wipe down the exterior, removing dust and debris. For tighter spaces, such as around the bobbin area or presser foot, use a small brush or compressed air. Avoid harsh chemicals or liquids, as they may damage the machine’s finish or internal components. Regularly cleaning the machine prevents dust buildup, which can affect stitching quality. Pay special attention to the feed dogs and stitch plate, as these areas tend to accumulate fabric residue. Cleaning after each project ensures smooth operation and prevents thread jams.
Oiling and Lubrication
Regular oiling and lubrication are crucial for maintaining the smooth operation of your Husqvarna sewing machine. Use a few drops of high-quality sewing machine oil on the hook area and shuttle race to keep moving parts well-lubricated. Gently turn the handwheel to ensure the oil is evenly distributed. Avoid over-lubrication, as excess oil can attract dust and cause residue buildup. Always refer to the manual for specific oiling points, as different models may vary. Proper lubrication prevents friction, reduces wear on mechanical components, and ensures consistent stitching. Regular maintenance will extend the life of your machine and keep it running effortlessly.
Regular Maintenance Schedule
Adhering to a regular maintenance schedule ensures your Husqvarna sewing machine operates efficiently and prolongs its lifespan. Daily, wipe dust from the exterior and interior using a soft cloth. Weekly, clean the bobbin area, feed dogs, and tension discs with a brush to remove lint and debris. Every 100 hours of use, lubricate the hook race and shuttle with a few drops of sewing machine oil. Monthly, inspect the presser foot and needle plate for alignment and tighten any loose screws. Every 6 months, have your machine serviced by a professional to check for wear and adjust timing. Regular maintenance prevents mechanical issues and ensures optimal performance.
Accessing Additional Resources
Access official Husqvarna sewing machine manuals online, explore customer support options, locate service centers, and join sewing communities for tips, troubleshooting, and shared experiences.
Downloading the Manual Online
To download the Husqvarna sewing machine manual, visit the official Husqvarna website or authorized retailers. Enter your machine’s model number in the search bar to locate the specific manual. Many manuals are available as free PDF downloads, ensuring easy access to instructions, troubleshooting guides, and maintenance tips. If the official site doesn’t have your model, platforms like the Internet Archive or sewing communities on Reddit may offer free PDF versions. Additionally, eBay and specialized sewing forums often provide links to rare or vintage manuals. Always verify the source to ensure authenticity and safety when downloading files online.
Customer Support and Service Centers
Husqvarna offers comprehensive customer support for sewing machine owners. Visit their official website to access dedicated service centers, where trained professionals can assist with repairs, maintenance, and troubleshooting. Additionally, Husqvarna’s customer service team is available to address inquiries and provide guidance via phone or email. For convenience, authorized service centers are located worldwide, ensuring prompt support. Online communities like Reddit’s sewing forums also serve as valuable resources, where users share experiences and solutions. Whether you need technical help or general advice, Husqvarna’s support network is designed to keep your machine running smoothly and enhance your sewing experience.
Online Communities and Forums
Online communities and forums are invaluable resources for Husqvarna sewing machine users. Platforms like Reddit’s r/sewing and r/SewingForBeginners offer spaces to share tips, troubleshoot issues, and connect with fellow sewists. These forums often feature discussions about Husqvarna models, including the Viking series, with users exchanging advice on machine maintenance, stitch selection, and project ideas. Additionally, specialized groups and sewing blogs provide tutorials, troubleshooting guides, and creative inspiration. Engaging with these communities can enhance your sewing experience by connecting you with experienced users and helping you make the most of your Husqvarna machine. Always follow community guidelines to ensure constructive and respectful interactions.
We hope this guide has provided you with a comprehensive understanding of your Husqvarna sewing machine. Grateful for your attention, and happy sewing!
Final Tips for Getting the Most Out of Your Machine
To maximize your Husqvarna sewing machine’s potential, explore its advanced features like one-step buttonholes and adjustable presser foot pressure. Regularly clean and oil the machine to ensure smooth operation. Engage with online communities for troubleshooting and creative inspiration. Keep the instruction manual handy for quick reference. Experiment with different fabrics and stitches to expand your sewing skills. Stay updated with maintenance schedules to prolong the machine’s lifespan. By following these tips, you’ll unlock your machine’s full capabilities and enjoy a rewarding sewing experience. Happy sewing!