Welcome to the Jenny Lind crib assembly guide. This comprehensive manual helps you safely assemble and configure your crib, ensuring a secure sleeping environment for your baby.
Overview of the Assembly Process
The Jenny Lind crib assembly process is straightforward but requires attention to detail. It involves unpacking components, assembling the frame, attaching side panels, and securing the mattress support system. Two people are recommended for easier assembly. Essential tools include a Phillips screwdriver and the provided Allen wrench. Follow the step-by-step instructions carefully to ensure stability and safety. Proper assembly ensures the crib converts seamlessly into different configurations, providing long-term functionality.
Safety Warnings and Precautions
Always follow assembly instructions precisely to avoid injury or death. Check for damaged hardware, loose joints, or missing parts before use. Ensure all fasteners are securely tightened.
Essential Safety Guidelines to Follow
Always read and follow the instructions carefully to ensure safety. Check for damaged hardware, loose joints, or missing parts before assembly. Avoid using the crib if any components are compromised. Use only the recommended tools, such as a Phillips screwdriver and Allen wrench. Tighten all fasteners securely to prevent collapse. Keep the crib away from hazards like curtains or blinds. Never skip steps or ignore warnings to guarantee a safe environment for your child.

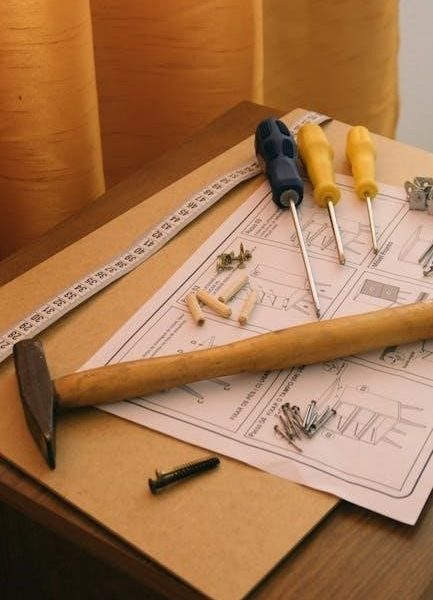
Tools and Hardware Needed for Assembly
The assembly requires a Phillips screwdriver and an Allen wrench, both essential for securing bolts and joints. The Allen wrench is typically included with the hardware.
Phillips Screwdriver and Allen Wrench Requirements
A Phillips screwdriver is necessary for assembling the crib, while an Allen wrench is typically included in the hardware box for securing bolts and joints. Ensure both tools are readily available to avoid delays. The Phillips screwdriver is not provided, so have one on hand. These tools are crucial for properly tightening connections and ensuring the crib’s stability and safety. Always use the correct tools to prevent damage or misalignment during assembly.
Step-by-Step Assembly Guide
Begin by unpacking and organizing all components. Follow the sequence: assemble the crib frame, attach side panels, and secure the mattress support system tightly.
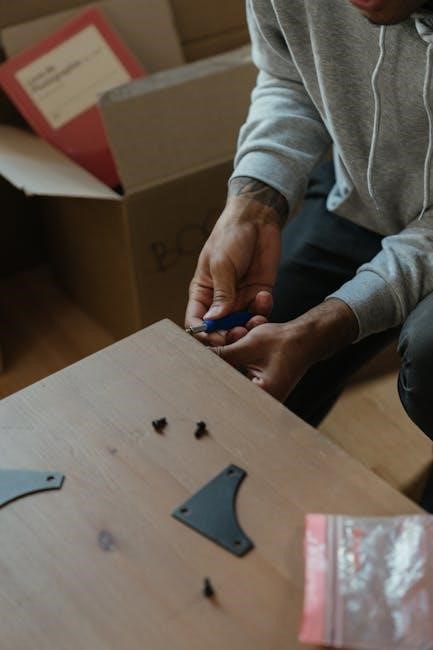
Unpacking and Organizing Components
Begin by carefully unpacking all crib components from the boxes. Inspect for any damage or missing parts. Organize hardware (e.g., screws, bolts) and major pieces (side panels, frame) separately. Use a flat, stable workspace to arrange items. Refer to the manual for a detailed inventory list. Ensure all parts are accounted for before starting assembly. This step ensures a smooth and efficient process.
Assembling the Crib Frame
Begin by attaching the side panels to the crib’s base using the provided hardware. Align the pre-drilled holes and secure with bolts. Use a Phillips screwdriver to tighten. Ensure the frame is level and stable. Follow the manual to connect all joints properly. Double-check the connections for tightness. If needed, use the Allen wrench for additional security. This step forms the foundation of the crib, so precision is key for safety and durability.
Attaching the Side Panels
Attach the side panels to the crib frame by aligning the pre-drilled holes. Insert the barrel cams into the side panels and align them with the frame’s cam screws. Secure the panels using the provided set screws. Tighten firmly with a Phillips screwdriver. Ensure the panels fit snugly and the crib remains stable. Refer to the manual for correct cam alignment. Double-check all connections for a secure fit.
Securing the Mattress Support System
Attach the mattress support system to the crib frame using the provided screws. Align the support brackets with the frame’s pre-drilled holes. Tighten the screws firmly with a Phillips screwdriver. Ensure the support system is level and secure. Adjust the height by moving the support brackets to the desired position. Double-check stability and confirm the mattress fits snugly within the crib. Proper installation ensures your baby’s safety and comfort.
Converting the Crib to Different Configurations
The Jenny Lind crib offers a versatile 3-in-1 design, easily converting from a crib to a toddler bed and beyond. Follow the manual for safe, seamless transitions.
From Crib to Toddler Bed
Converting the Jenny Lind crib to a toddler bed is straightforward. Remove the crib rail and attach the toddler rail using the provided hardware. Ensure all bolts are securely tightened for stability. This transition extends the crib’s usability as your child grows, offering a safe and comfortable sleeping solution for toddlers. Always refer to the manual for specific instructions and safety checks.
Adjusting the Mattress Height
The Jenny Lind crib features a three-position mattress support system, allowing you to adjust the height as your child grows. To lower or raise the mattress, loosen the bolts at the base, slide the support to the desired position, and tighten securely. This ensures the mattress remains at a safe and comfortable height, accommodating your baby’s growth and developmental needs while maintaining stability and safety.
Troubleshooting Common Assembly Issues
Identify hardware malfunctions or joint misalignments. Check for loose parts or incorrect tool usage. Re-examine instructions for proper assembly steps to resolve issues efficiently and safely.
Identifying and Fixing Alignment Problems
Start by inspecting all components for damage or defects. Use a level to ensure the crib frame is even. If parts misalign, double-check the instructions and verify proper hardware usage. Gently disassemble and reattach components as needed. Avoid forcing parts, as this can cause structural issues. Ensure all joints are secure and alignment pins are correctly positioned. Refer to the manual for specific guidance on realigning components safely and effectively.
Resolving Hardware and Joint Issues
If hardware or joints feel loose, tighten all bolts and screws using the provided Allen wrench or Phillips screwdriver. Inspect for stripped screws or damaged joints. Replace any missing or damaged hardware immediately. For misaligned joints, disassemble and reattach components carefully, ensuring proper alignment. If issues persist, contact customer support for assistance. Always follow the manual’s guidance to maintain structural integrity and safety.
Maintenance Tips for Longevity
Regularly clean the crib with a damp cloth and inspect hardware for tightness. Ensure all bolts and screws are secure to maintain stability and safety.
Cleaning and Inspecting the Crib Regularly
Regular cleaning ensures a safe and hygienic environment for your baby. Use a damp cloth to wipe down all surfaces, avoiding harsh chemicals that could damage the finish. For solid wood cribs like the Jenny Lind, a mild soap solution is recommended. Always dry the crib thoroughly after cleaning to prevent moisture damage.
Inspect the crib monthly for loose bolts, worn-out hardware, or signs of damage. Tighten any loose joints and replace damaged parts immediately to maintain stability and safety. Regular inspections help prevent potential hazards and ensure the crib remains sturdy for years to come.
Product Features and Benefits
The Jenny Lind crib offers a 3-in-1 convertible design, transitioning from crib to toddler bed and daybed. Its sturdy construction ensures long-lasting safety and durability for your child.
3-in-1 Convertible Design
The Jenny Lind crib features a versatile 3-in-1 design, seamlessly transitioning from a baby crib to a toddler bed and finally to a daybed. This adaptability ensures the crib grows with your child, providing a safe and comfortable sleeping solution through various stages of development. The design maintains its classic charm while offering practical functionality for years to come. Assembly instructions are included to guide each conversion step smoothly.
Sturdy Construction and Safety Features
The Jenny Lind crib is crafted with solid wood, ensuring durability and stability. It features a three-position mattress support system for adjustable height settings, meeting safety standards. The crib includes stationary sides for added stability and rounded spindle posts to prevent injury. Designed with safety in mind, it adheres to ASTM and CPSC standards, providing a secure environment for your child. Regular inspections are recommended to maintain its integrity and safety features.
Understanding the User Manual
The user manual provides clear, step-by-step instructions for assembling and using the Jenny Lind crib. It includes safety precautions, hardware requirements, and configuration options to ensure proper setup and usage.
Navigating the Instruction Manual
Navigating the Jenny Lind crib manual is straightforward. Each section is clearly labeled, starting with safety warnings and tools needed, followed by detailed assembly steps. The manual includes diagrams and concise instructions to guide you through unpacking, frame assembly, and configuration changes. Pay attention to highlighted warnings and tips for a smooth assembly process. Always refer back if unsure about any step to ensure everything is correctly secured and aligned for your baby’s safety.
Importance of Following Instructions
Following the Jenny Lind crib instructions is crucial for ensuring safety and proper assembly. Deviating from the guidelines can lead to structural instability, posing risks to your child. Each step is carefully designed to meet safety standards, so adhering to them guarantees a secure and durable crib. Take the time to read and understand each instruction thoroughly before proceeding with assembly to avoid potential hazards and ensure your baby’s well-being.

Additional Resources
Access video guides, tutorials, and customer support for assembly help. Refer to FAQs for troubleshooting common issues and ensuring a smooth assembly process for additional support.
Video Assembly Guides and Tutorials
Watch step-by-step video guides for assembling the Jenny Lind crib. These tutorials provide visual instructions for attaching side panels, securing the mattress support, and converting the crib to a toddler bed. They also cover troubleshooting common issues like alignment problems and hardware malfunctions. Videos are available on YouTube and the official product websites, offering clear demonstrations to ensure a smooth and safe assembly process for all configurations.
Customer Support and FAQs
For assistance with Jenny Lind crib assembly, contact customer support at (800) 967-6696 or via email. FAQs address common concerns like missing parts and hardware issues. Troubleshooting guides help resolve alignment and joint problems. Additional resources, including video tutorials, are available online to aid with assembly. Ensure to follow all safety instructions carefully for a secure and stable crib setup.

Common Mistakes to Avoid
Avoid using incorrect tools and misaligning components. Ensure all hardware is securely tightened, and follow instructions precisely to prevent instability and safety hazards.
Incorrect Use of Tools and Hardware
Using the wrong tools, such as a flathead screwdriver instead of a Phillips head, can damage hardware. Ensure the Allen wrench and screwdriver are used correctly to avoid stripped screws or loose joints. Never overtighten, as this may damage wood or compromise stability. Always verify hardware integrity before assembly to prevent issues like missing parts or damaged fasteners, which can lead to unsafe conditions for your baby.
Skip or Misalign Components
Skip or misalign components can lead to instability and safety hazards. Always follow the assembly sequence to ensure proper alignment of side panels, mattress support, and frame. Double-check each step before moving forward. Misaligned parts can result in a wobbly crib or gaps, compromising structural integrity. Verify that all hardware is securely fastened and components are correctly positioned to maintain safety and stability for your baby.
Complete a final inspection to ensure all parts are securely fastened and properly aligned. Verify the crib’s stability and safety features before use to guarantee a secure sleeping environment.
Ensuring Stability and Safety
After assembly, conduct a final inspection to ensure all components are secure and properly aligned. Check for any damaged hardware, loose joints, or sharp edges. Test the crib’s stability by gently rocking it to confirm it doesn’t wobble. Ensure the mattress support system is correctly positioned and all safety features are intact. Double-check that all bolts and screws are tightened firmly for maximum stability and safety.