
SoClean 2 User Manual: A Comprehensive Guide
Welcome! This manual provides essential guidance for safely and effectively utilizing your SoClean 2 device‚ ensuring optimal hygiene for your CPAP therapy equipment.

The SoClean 2 is an automated device designed to clean‚ disinfect‚ and dry your CPAP (Continuous Positive Airway Pressure) supplies – mask‚ tubing‚ and reservoir – daily. It utilizes a specialized cleaning solution and ozone technology to eliminate harmful bacteria‚ viruses‚ and mold that can accumulate within your equipment.
Regular cleaning is crucial for maintaining the effectiveness of your CPAP therapy and preventing potential health risks. The SoClean 2 simplifies this process‚ offering a convenient and efficient alternative to manual washing. By automating the cleaning routine‚ you can ensure consistent hygiene and focus on a restful night’s sleep.
This user manual will guide you through the setup‚ operation‚ maintenance‚ and troubleshooting of your SoClean 2‚ empowering you to maximize its benefits and enjoy a cleaner‚ healthier CPAP experience. Please read this manual thoroughly before using the device.
What’s in the Box? — Unpacking Your SoClean 2
Carefully unpack your SoClean 2 and verify that all components are present. The box should contain the following items:
- SoClean 2 Unit: The main cleaning and disinfecting device.
- Water Reservoir: A removable container for holding the cleaning solution and water.
- Hose Adapter: Connects your CPAP tubing to the SoClean 2.
- Power Adapter: Used to power the SoClean 2 unit.
- Cleaning Solution (1 bottle): SoClean’s proprietary disinfecting solution.
- User Manual: This document providing instructions and safety information.
Inspect the packaging for any signs of damage during shipping. If any components are missing or appear damaged‚ immediately contact customer support for assistance. Do not attempt to operate the device if parts are missing or broken. Retain the original packaging for potential returns or warranty claims.
Component Checklist
Before proceeding‚ please confirm the presence of each item listed below. Checking against this list ensures you have everything needed for proper setup and operation of your SoClean 2.
- SoClean 2 Base Unit: (Quantity: 1) – Verify no visible cracks or damage.
- Water Reservoir Tank: (Quantity: 1) – Ensure it’s clear and free of defects.
- Standard Hose Adapter: (Quantity: 1) – Check for proper threading and secure fit.
- Power Supply Adapter: (Quantity: 1) – Inspect for frayed wires or damage to the plug.
- SoClean Solution (8oz Bottle): (Quantity: 1) – Confirm the seal is intact.
- User Manual & Quick Start Guide: (Quantity: 1 each) – For reference and troubleshooting.
If any item is missing or damaged‚ do not use the device. Contact customer support immediately to request a replacement. Keeping this checklist handy will simplify future maintenance.
Initial Inspection for Damage
Carefully inspect all components of your SoClean 2 for any signs of shipping damage before initial use. This proactive step helps prevent potential malfunctions and ensures your safety. Begin with the base unit‚ looking for cracks in the casing or damage to the control panel.
Next‚ examine the water reservoir for any chips‚ leaks‚ or distortions. Thoroughly check the hose adapter for broken threads or a compromised seal. Inspect the power adapter for frayed wires‚ bent pins‚ or a damaged plug.
If you discover any damage‚ do not connect the device to power or water. Immediately contact customer support with details and photos of the damage to arrange for a replacement. Documenting damage upfront protects your warranty.

Setting Up Your SoClean 2
Proper setup is crucial for the SoClean 2’s performance and longevity. Begin by selecting a stable‚ level surface capable of supporting the unit’s weight‚ ensuring adequate ventilation around the device. Avoid direct sunlight and areas prone to excessive moisture.

Before connecting to power‚ ensure the unit is completely dry. Use only the provided power adapter‚ plugging it into a grounded electrical outlet. Next‚ prepare the water connection; a standard faucet connection is required. Ensure the water supply line is securely attached to prevent leaks.
Double-check all connections before proceeding. A correctly set up SoClean 2 will contribute to consistent‚ effective cleaning of your CPAP equipment‚ promoting better sleep and overall health.
Placement Requirements & Considerations
When choosing a location for your SoClean 2‚ prioritize a flat‚ stable surface that can comfortably support its weight. The unit should be positioned near a grounded electrical outlet and a water source for easy access during filling and maintenance.
Avoid placing the SoClean 2 in direct sunlight or near heat sources‚ as this could potentially damage the internal components. Ensure there’s ample space around the device – at least 6 inches on all sides – to allow for proper ventilation;
Keep the unit away from areas with high humidity or potential water splashes. A dry environment is essential for optimal performance and to prevent electrical hazards. Consider the proximity to your CPAP machine for convenient operation.
Connecting to Power & Water Supply
Before powering on your SoClean 2‚ ensure the unit is placed on a stable surface as described previously. Connect the provided power adapter to the back of the device and then plug it into a grounded electrical outlet. Verify the outlet voltage matches the adapter’s specifications.
For the water supply‚ carefully open the water reservoir lid. Using distilled water only‚ fill the reservoir to the “Max Fill” line indicated inside. Do not overfill. Tap water or bottled water may contain minerals that can damage the unit and void the warranty.
Securely close the reservoir lid‚ ensuring a tight seal. The SoClean 2 is now ready for operation once the water is added and the power is connected.
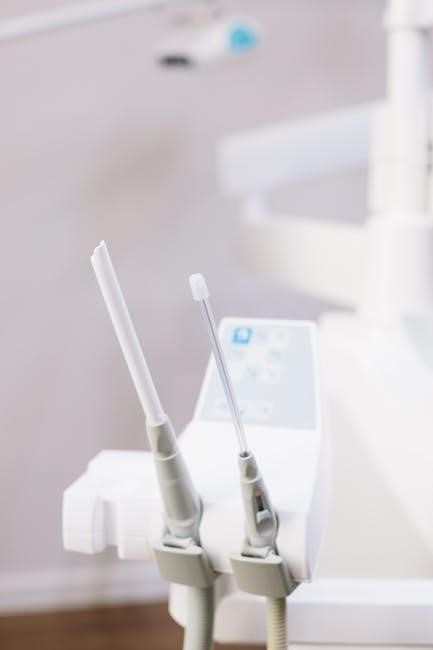
Understanding the Control Panel
The SoClean 2 features an intuitive control panel designed for ease of use. The primary button‚ marked with a power symbol‚ initiates and stops the cleaning cycle. A separate button‚ labeled “Cycle‚” allows you to select between standard and extended cleaning durations.
The LCD display prominently shows the remaining cycle time. Several indicator lights provide crucial information: a “Water Level” indicator alerts you when the reservoir needs refilling‚ while a “Clean” indicator illuminates upon cycle completion.
Error codes‚ displayed as alphanumeric sequences‚ signal potential issues. Refer to the Troubleshooting section for a comprehensive error code resolution guide. Familiarizing yourself with these controls and indicators will ensure smooth and efficient operation of your device.
Button Functions Explained
The Power Button‚ easily identifiable by its universal symbol‚ serves as the primary control for your SoClean 2. A single press initiates the cleaning cycle‚ utilizing the default settings. Pressing and holding this button for three seconds will completely power down the unit.
The Cycle Select Button allows customization of the cleaning process. Each press toggles between the ‘Standard’ and ‘Extended’ cleaning modes. ‘Standard’ is ideal for daily cleaning‚ while ‘Extended’ provides a more thorough sanitization when needed.
There isn’t a dedicated ‘Start’ button; the cycle begins automatically after selecting the desired mode and ensuring sufficient water levels. Understanding these simple functions will empower you to efficiently manage your CPAP cleaning routine.
Display Indicators & Error Codes
The SoClean 2 display utilizes several indicators to communicate its status. A solid blue light signifies normal operation during the cleaning cycle. A flashing blue light indicates the cycle is paused or preparing to start. A red light signals an error condition requiring attention.

Error Code E1 indicates a low water level – refill the reservoir immediately. Error Code E2 suggests a potential issue with the internal pump; contact customer support. Error Code E3 signals a problem with the lid seal‚ ensure it’s properly secured.
A blank display may indicate a power issue; verify the power cord connection. Regularly checking these indicators and understanding the error codes will help maintain optimal performance and quickly resolve any issues with your SoClean 2.
Daily Operation: Cleaning Your CPAP Supplies
Daily cleaning with your SoClean 2 is crucial for maintaining a hygienic CPAP therapy experience. Begin by ensuring the unit is placed on a stable‚ level surface. The process is remarkably simple and designed for convenience.
First‚ carefully fill the reservoir with distilled water to the designated fill line. Next‚ gently load your CPAP mask‚ tubing‚ and humidifier reservoir into the chamber‚ ensuring they are fully submerged. Avoid overcrowding.
Finally‚ securely close the lid and press the start button. The SoClean 2 will automatically initiate the cleaning cycle‚ typically lasting around 60 minutes. Once complete‚ the unit will automatically shut off. Remove your cleaned items and allow them to air dry before use.
Filling the SoClean 2 with Water
Proper water level is essential for effective cleaning and to prevent damage to your SoClean 2. Always use distilled water – tap water contains minerals that can build up and affect performance‚ potentially voiding your warranty.

Locate the water reservoir on the unit. Carefully remove the lid. You’ll notice a clearly marked fill line inside the reservoir. Slowly pour distilled water into the reservoir until it reaches this line. Do not overfill‚ as this can cause leaks or damage the internal components.
Avoid using any additives‚ soaps‚ or cleaning solutions other than distilled water. Once filled to the correct level‚ securely replace the lid‚ ensuring a tight seal. Regularly check the water level before each cleaning cycle.
Loading Your Mask‚ Tubing & Reservoir
Before loading‚ ensure your CPAP mask‚ tubing‚ and humidifier reservoir are disconnected from your CPAP machine. Inspect each item for any visible damage – do not clean damaged components in the SoClean 2.
Gently place your mask‚ with all cushions and headgear attached‚ inside the SoClean 2 chamber. Ensure the mask is positioned so that water can circulate freely around all surfaces. Next‚ carefully coil your CPAP tubing and place it inside the chamber‚ avoiding any tight bends or kinks.
Finally‚ if applicable‚ place your humidifier reservoir (without water) into the chamber. Do not submerge any electrical components. Ensure all items fit comfortably without being overly compressed. Close the lid securely before starting the cleaning cycle.
Starting the Cleaning Cycle
Once loaded and the lid is securely closed‚ press the power button on the control panel to initiate the cleaning cycle. The SoClean 2 will automatically begin filling with water and activating the ozone cleaning process. The display will indicate the cycle’s progress.
A standard cleaning cycle typically lasts approximately 15-20 minutes. Do not interrupt the cycle once it has started. Avoid opening the lid during operation‚ as this will release ozone into the surrounding air. The unit will automatically shut off upon completion.

After the cycle finishes‚ allow the items to air dry completely before reconnecting them to your CPAP machine. A slight ozone odor is normal and will dissipate quickly. Always ensure proper ventilation in the room.

Maintenance & Cleaning of the SoClean 2 Unit
Regular maintenance is crucial for optimal performance and longevity of your SoClean 2. Beyond cleaning your CPAP supplies‚ the unit itself requires periodic attention. This includes descaling to remove mineral buildup and cleaning both the exterior and interior surfaces.
Consistent descaling prevents reduced efficiency and potential damage. The frequency depends on your water hardness; generally‚ every 30-60 days is recommended. Wipe down the exterior with a damp cloth regularly. Avoid abrasive cleaners.
For the interior‚ a mild soap and water solution can be used‚ ensuring thorough rinsing afterward. Never submerge the base unit in water. Proper upkeep ensures hygienic operation and extends the life of your device.
Descaling Procedure (Frequency & Steps)
Descaling removes mineral deposits that accumulate with regular use‚ typically every 30-60 days depending on water hardness. Frequency: Hard water requires more frequent descaling.
Steps: 1. Drain the SoClean 2. 2. Fill with a mixture of one part white vinegar and one part distilled water. 3. Run a full cleaning cycle. 4. Repeat with fresh vinegar/water solution. 5. Run two cycles with only distilled water to rinse thoroughly.
Important: Ensure complete rinsing to avoid vinegar residue. Do not use harsh chemicals or descaling solutions not specifically recommended for the SoClean 2. Regular descaling maintains optimal cleaning performance and prevents damage to the unit.
Cleaning the Exterior & Interior Surfaces
Regular cleaning of both the exterior and interior surfaces contributes to hygiene and longevity. Exterior: Wipe down the SoClean 2’s exterior with a damp‚ soft cloth. Avoid abrasive cleaners which can damage the finish. A mild soap solution is acceptable‚ but ensure it’s thoroughly wiped away.
Interior: After descaling and rinsing‚ wipe the interior chamber with a clean‚ damp cloth. Pay attention to the base and corners where residue may accumulate. For stubborn deposits‚ use a soft brush.
Caution: Never immerse the SoClean 2 in water. Ensure the unit is unplugged before cleaning. Do not use harsh chemicals or solvents. Proper cleaning prevents bacterial growth and maintains optimal performance.
Troubleshooting Common Issues
Encountering problems? This section addresses frequent concerns. Unit won’t start: Check the power connection and ensure the water reservoir is properly seated. Cleaning cycle interrupted: Verify the water level is sufficient and the lid is securely closed.
Error codes: Refer to the ‘Display Indicators & Error Codes’ section for specific meanings and solutions. Unusual noises: This may indicate low water levels or a need for descaling. Mask not fully cleaned: Ensure proper loading and sufficient water coverage.
If issues persist‚ consult the full error code list or contact customer support. Do not attempt to disassemble or repair the unit yourself‚ as this voids the warranty.
Error Code Resolution Guide
Error Code E1: “Low Water Level” – Immediately add distilled water to the reservoir‚ ensuring it reaches the minimum fill line. Restart the cleaning cycle. Error Code E2: “Reservoir Not Detected” – Remove and reseat the water reservoir‚ confirming a secure connection. Restart the cycle.
Error Code E3: “Lid Not Secure” – Ensure the SoClean 2 lid is firmly closed and latched. A loose lid prevents operation. Error Code E4: “Descaling Required” – Initiate the descaling procedure as outlined in the ‘Maintenance & Cleaning’ section.
Error Code E5: “System Error” – Power cycle the unit (unplug‚ wait 30 seconds‚ plug back in). If the error persists‚ contact customer support for assistance. Note: Ignoring error codes can damage the device.
Addressing Water Leaks & Other Problems
Water Leaks: Inspect the reservoir for cracks or damage. Ensure the lid is properly sealed and latched. Check the water supply connection for tightness. Minor leaks may resolve with reseating components. Unusual Noises: A slight humming is normal; however‚ loud grinding or clicking indicates a potential issue. Discontinue use and contact support.
Device Not Powering On: Verify the power cord is securely connected to both the unit and a functioning outlet. Check the fuse (if applicable). Cleaning Issues: If supplies aren’t adequately cleaned‚ ensure proper water levels and loading techniques are followed.
Persistent Problems: For issues not resolved by these steps‚ consult the full troubleshooting guide online or contact SoClean customer service for expert assistance.
Safety Precautions & Warnings
Important Safety Instructions: Always unplug the SoClean 2 before cleaning or performing maintenance. Do not immerse the unit in water. Use only distilled water to prevent mineral buildup and ensure optimal performance. Keep the device out of reach of children and pets.
Warning: Never operate the SoClean 2 if the power cord or plug is damaged; Do not attempt to disassemble or repair the unit yourself; contact qualified service personnel. Avoid using harsh chemicals or abrasive cleaners on the device. Ensure adequate ventilation during operation.
Caution: This device is intended for cleaning CPAP supplies only. Misuse may result in damage or injury. Read all instructions carefully before use.