Welcome to the Craftsman Garage Door Opener Troubleshooting Manual. This comprehensive guide provides detailed instructions for diagnosing and resolving common issues with your garage door opener. Designed to assist homeowners in performing DIY repairs safely and effectively, the manual covers essential troubleshooting steps, maintenance tips, and safety precautions to ensure your garage door operates smoothly and efficiently. By following the guidelines outlined in this manual, you can identify and address problems quickly, saving time and money on professional repairs.
1.1 Importance of the Manual for DIY Repairs
This manual is essential for homeowners seeking to repair their Craftsman garage door opener themselves. It provides clear, step-by-step instructions to diagnose and resolve common issues, empowering users to address problems confidently. By following the guide, you can save time and money while ensuring safety. The manual covers troubleshooting, maintenance, and repair tips, making it an invaluable resource for DIY enthusiasts. Regular use of this manual helps prevent future issues and extends the opener’s lifespan.
1.2 How to Find Your Model Number for Specific Instructions
To locate your Craftsman garage door opener’s model number, check the sides of the unit or the owner’s manual. The model number is essential for accessing specific repair parts and instructions. You can also find it on the product’s packaging or by visiting Sears PartsDirect or ManualsLib online. Once identified, use this number to download the exact manual for your model, ensuring accurate troubleshooting and repair guidance.
Common Issues with Craftsman Garage Door Openers
Craftsman garage door openers may experience issues like doors not opening or closing, remote controls malfunctioning, strange noises during operation, and lights flashing or not working. These problems can often be resolved with basic troubleshooting steps outlined in this manual, ensuring smooth and safe operation of your garage door system.
2.1 Garage Door Not Opening or Closing
If your garage door fails to open or close, it may indicate issues with the power supply, circuit breakers, or remote control functionality. Check if the opener is receiving power and ensure no obstructions block the door’s path. Verify sensor alignment and test the wall switch. Consult the manual for specific troubleshooting steps tailored to your model, addressing potential causes like worn parts or misaligned tracks to restore proper operation.
2.2 Remote Control Not Responding
If your remote control isn’t responding, start by checking the batteries or replacing them if necessary. Ensure the remote is programmed correctly and compatible with your opener’s model. Verify that no obstructions are blocking the infrared signal between the remote and the opener. If issues persist, refer to your manual for reprogramming instructions or reset the opener’s remote settings to restore functionality.
2.3 Strange Noises During Operation
Strange noises during operation, such as grinding or scraping sounds, often indicate wear or misalignment. Check for loose chains, worn gears, or lack of lubrication. Inspect the tracks for debris or obstructions. Lubricating moving parts regularly can prevent excessive noise. If the issue persists, refer to your manual for specific troubleshooting steps or consider replacing worn components to ensure smooth operation and extend the opener’s lifespan.
2.4 Lights Flashing or Not Working
Lights flashing or not working on your Craftsman garage door opener may indicate a power issue or sensor malfunction. First, ensure the opener is properly plugged in and the circuit breaker hasn’t tripped. Check for loose connections or faulty bulbs. If lights continue to flash, it could signal a problem with the safety sensors or internal electronics. Refer to your manual for specific troubleshooting steps or consult a professional if the issue persists.
Safety Precautions Before Troubleshooting
Always disconnect power and ensure the garage door is balanced before troubleshooting. Avoid entanglement with moving parts and follow all safety guidelines to prevent accidents.
3.1 Disconnecting Power and Ensuring Safety
Before troubleshooting, unplug the garage door opener from the power source and switch off the circuit breaker. Ensure the garage door is balanced and secured to prevent unexpected movement. Disconnect any remote controls or wall switches to avoid accidental activation. Always verify that the door is stable and properly supported before performing any repairs. Never attempt repairs while the door is under tension from springs or cables, as this can lead to serious injury.
3.2 Checking Garage Door Balance
Ensure the garage door is properly balanced before troubleshooting. An unbalanced door can cause safety hazards and affect opener performance. Disconnect the opener and manually open the door halfway. If it doesn’t stay in place or feels heavy, adjust the springs or cables. A balanced door should move smoothly and remain steady without assistance. Always test the door’s balance after adjustments to confirm it operates safely and efficiently.
3.3 Avoiding Entanglement with Moving Parts
Always ensure loose clothing and jewelry are secure to prevent entanglement with moving parts. Keep children away from the garage door while it’s operating. During installation or repairs, disconnect power and remove any ropes or locks as instructed in the manual. Never leave tools or parts near moving components that could cause accidental entanglement. Following these steps helps maintain a safe environment for everyone.
Step-by-Step Troubleshooting Guide
This section provides a detailed, sequential approach to diagnosing and resolving common issues with your Craftsman garage door opener. From checking power supply and remote functionality to adjusting limits and lubricating parts, each step is designed to help you identify and fix problems efficiently, ensuring smooth operation and extending the lifespan of your opener.
4.1 Checking Power Supply and Circuit Breakers
Start by verifying the power supply to your Craftsman garage door opener. Ensure the unit is properly plugged into a functioning outlet. Check your home’s circuit breaker or fuse box to confirm the garage door opener circuit has not tripped or blown a fuse. If the breaker has tripped, reset it and test the opener. Also, inspect the GFCI outlet if applicable, as it may have interrupted power supply.
If the issue persists, verify that no loose connections exist between the power cord and the opener. Consult your manual for specific instructions on resetting or testing the power supply. Addressing power-related issues first can prevent unnecessary troubleshooting of other components, ensuring a quick resolution to your garage door opener’s malfunction.
4.2 Inspecting Remote Control and Sensors
Begin by checking the remote control for weak or dead batteries. Replace them if necessary and test the opener. Next, inspect the sensors located near the garage door tracks. Ensure they are clean, aligned, and free from obstructions. Misaligned or dirty sensors can disrupt the opener’s operation. Refer to your manual for instructions on how to clean and adjust these components properly. This step is crucial for ensuring smooth and safe door operation.
4.3 Adjusting Limits and Force Settings
Adjusting the limit and force settings ensures your garage door opens and closes properly. Refer to your manual to locate the adjustment knobs. Turn them clockwise to increase or counterclockwise to decrease the force. Test the door’s operation after each adjustment. Ensure the door stops correctly at the floor and fully opens without excessive force. Improper settings can lead to safety hazards, so follow instructions carefully.
4.4 Lubricating Moving Parts
Lubricating moving parts is essential for smooth operation. Use a silicone-based lubricant on chains, gears, and rollers. Clean parts first to remove dirt. Apply lubricant sparingly to avoid attracting dust. Open and close the door to distribute the lubricant evenly. Regular lubrication reduces noise and prevents wear. Follow the manual for specific parts to lubricate. Avoid over-lubrication, as it can attract debris. This maintenance step ensures optimal performance and extends the opener’s lifespan.
Advanced Troubleshooting for Persistent Issues
For stubborn problems, inspect worn parts, check remote signal strength, and reset the opener. Addressing these advanced issues ensures reliable operation and prevents further damage.
5.1 Replacing Worn or Damaged Parts
Inspect and replace worn or damaged components like chains, gears, or idler pulleys to restore smooth operation. Refer to your model number for correct replacement parts. Ensure the garage door is secure and power is disconnected before starting any repair. Replace worn wear pads and tighten loose hardware to prevent further damage. Always consult the manual for specific part numbers and installation guidelines to ensure safety and proper function.
5.2 Checking for Interference with Remote Signals
Ensure your remote control operates without interference by checking nearby devices using similar frequencies. Move other electronic devices away and test the remote. Physical obstructions or weak signals can cause issues. Resynchronize the remote with the opener by following manual instructions. Consider upgrading to a MyQ-enabled system for enhanced reliability and smartphone control, ensuring uninterrupted operation and modern convenience.
5.3 Resetting the Garage Door Opener
Resetting your Craftsman garage door opener can resolve persistent issues. Start by disconnecting power, then reconnect after 30 seconds. Press and hold the “Learn” button until the LED blinks. Release and reprogram all remotes. Test the door to ensure proper function. If issues persist, refer to the manual for specific reset procedures tailored to your model. This step often restores default settings and resolves software-related problems effectively.
Maintenance Tips to Prevent Future Problems
Regular lubrication of chains and gears, cleaning sensors, and annual professional inspections are essential to maintain optimal performance and prevent potential issues with your garage door opener.
6.1 Regular Lubrication of Chains and Gears
Regular lubrication of chains and gears is crucial to ensure smooth operation and prevent wear. Use a silicone-based spray lubricant on moving parts every 6 to 12 months. Avoid over-lubrication, as it can attract dust and dirt. Wipe off excess lubricant with a clean cloth. This maintenance step helps reduce noise, prevents rust, and extends the lifespan of your garage door opener’s mechanical components.
6.2 Cleaning Sensors and Tracks
Clean sensors and tracks regularly to ensure proper function. Use a soft cloth to wipe sensors, removing dirt or debris that may interfere with the door’s operation. For tracks, remove any dust or grime with a mild detergent and rinse thoroughly. Avoid using harsh chemicals that could damage components. Keeping these areas clean prevents misalignment and ensures smooth, quiet operation of your garage door opener.
6.3 Scheduling Annual Professional Inspections
Scheduling annual professional inspections ensures your garage door opener operates safely and efficiently. A trained technician will inspect all components, including sensors, tracks, and springs, to identify potential issues before they escalate. Regular inspections help prevent unexpected breakdowns and extend the lifespan of your opener. This proactive approach ensures compliance with safety standards and provides peace of mind for homeowners.

Tools and Parts Needed for Repairs
Essential tools include screwdrivers, wrenches, and pliers. Common parts like chains, pulleys, and sensors may need replacement. Always refer to your model-specific manual for details.
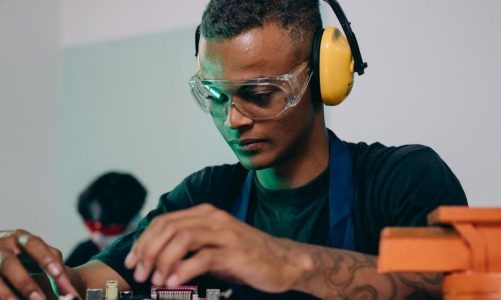
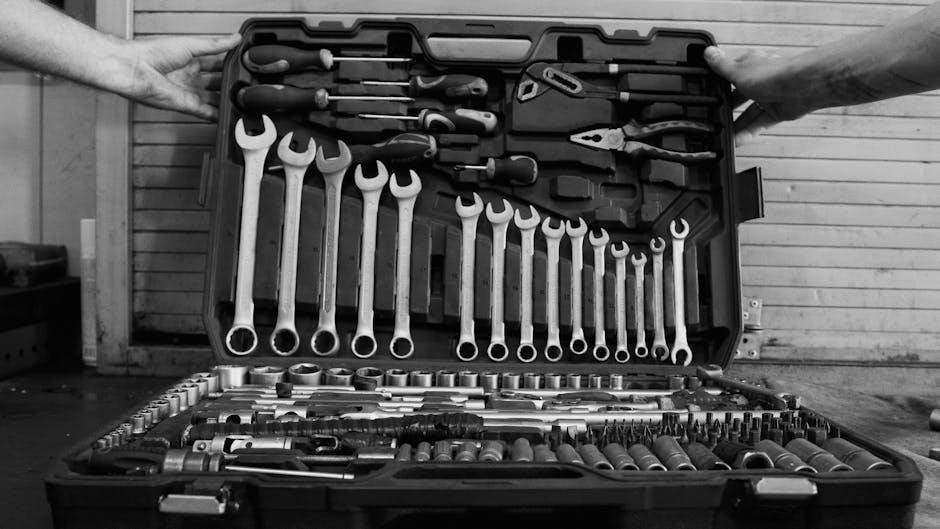
7.1 Essential Tools for DIY Troubleshooting
For effective DIY repairs, gather essential tools like screwdrivers (Phillips and flathead), adjustable wrenches, pliers, and Allen wrenches. Lubricants, such as silicone-based sprays, are crucial for maintaining moving parts. A multimeter can help check electrical connections, while a ladder ensures safe access to the opener. Always refer to your model-specific manual for a detailed list of required tools to ensure proper and safe repairs.
7.2 Common Replacement Parts
Common replacement parts for Craftsman garage door openers include chains, cables, idler pulleys, and wear pads. These components often wear out over time and may need replacement to ensure smooth operation. Additionally, remote control batteries, sensors, and circuit boards are frequently replaced. Always verify your opener’s model number to purchase compatible parts. Refer to the manual or manufacturer’s website for a detailed list of replacement parts specific to your model.

Additional Resources for Further Assistance
For further assistance, download the full manual online, contact Craftsman customer support, or visit online forums for community help and troubleshooting advice.
8.1 Downloading the Full Manual Online
To access detailed troubleshooting guides and repair instructions, download the full Craftsman Garage Door Opener manual online. Visit the official Craftsman website or platforms like Manua.ls, where you can search for your specific model number. Popular models such as the Craftsman CMXEOCG771 and CMXEOCG231 are readily available in PDF format, ensuring you have comprehensive guidance for DIY repairs and maintenance. This resource is essential for resolving complex issues and ensuring optimal performance of your garage door opener.
8.2 Contacting Craftsman Customer Support
If you need personalized assistance, contact Craftsman Customer Support directly. Visit their official website and use the contact form or call their support number. Provide your model number and a detailed description of the issue for faster resolution. Craftsman’s knowledgeable representatives can guide you through troubleshooting, repair, or maintenance, ensuring your garage door opener functions properly and safely. Their support team is available to address your concerns promptly and effectively.
8.3 Online Forums and Community Help
Online forums and community discussions offer valuable insights and solutions for Craftsman garage door opener issues. Websites like Reddit and specialized DIY forums often feature threads where users share their experiences and troubleshooting tips. These platforms can provide peer-reviewed advice, helping you identify common problems and solutions. Additionally, many enthusiasts and experts contribute detailed guides and repair strategies, making online communities a valuable resource for DIY troubleshooting and maintenance.
This manual empowers homeowners to diagnose and resolve Craftsman garage door opener issues safely and efficiently, ensuring reliable operation and preventing future problems through proper maintenance.
9.1 Summary of Key Troubleshooting Steps
Start by resetting the garage door opener and checking for signal interference. Inspect sensors for proper alignment and ensure the chain or belt is not worn. Test the safety reversal mechanism and verify all connections are secure. If issues persist, refer to the manual for specific repair instructions or contact Craftsman support for further assistance. Regular maintenance can prevent many common problems.
9.2 Encouragement to Follow Safety Guidelines
Safety is paramount when troubleshooting your Craftsman garage door opener. Always disconnect power and ensure the door is balanced before starting any repairs. Avoid wearing loose clothing and keep children away from moving parts. Following the manual’s guidelines helps prevent accidents and ensures effective troubleshooting. Remember, your safety and the door’s proper function depend on careful adherence to these precautions. If unsure, consulting a professional is advisable.