
Welcome to the Smart Bracelet Instruction Manual․ This guide helps you understand and maximize your device’s features, ensuring a seamless experience for fitness, health, and daily convenience․
Overview of the Device and Its Features
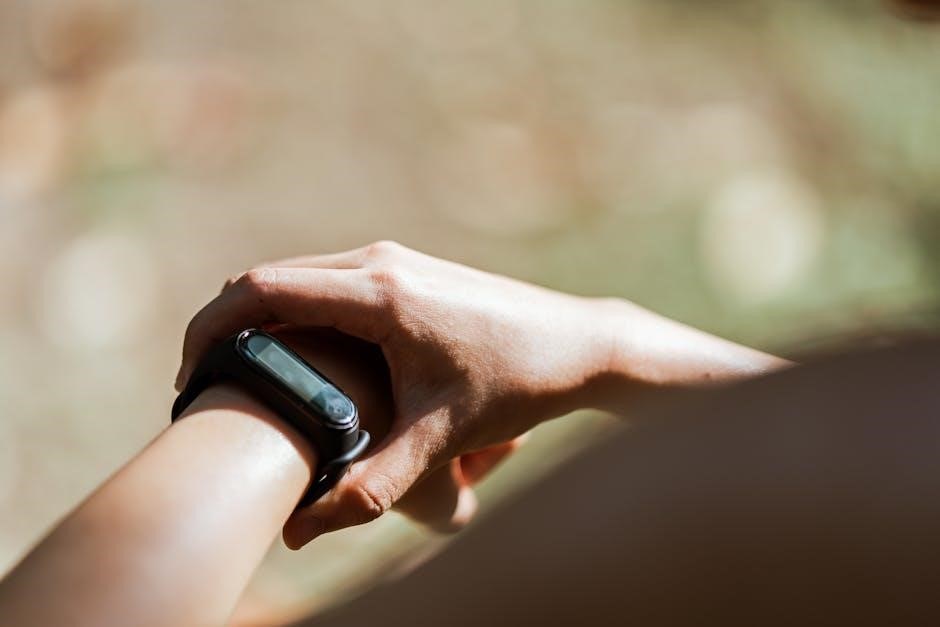
The smart bracelet is a sleek, versatile wearable device designed to track your daily activities and health metrics․ It features a touchscreen display, gesture controls, and compatibility with both Android and iOS devices․ The bracelet monitors steps, distance, heart rate, and sleep quality, while also offering customizable watch faces and notification alerts․ It syncs seamlessly with its dedicated app, providing detailed insights into your fitness journey․ Built with durable materials, the smart bracelet combines style and functionality, making it a perfect companion for fitness enthusiasts and everyday users alike․

Unpacking and Initial Setup
Unpack your smart bracelet, ensuring all components are included․ Charge it using the provided USB cable․ Follow the manual for initial setup and activation steps․
Contents of the Package
Your smart bracelet package includes the following items: the smart bracelet itself, a To charge your smart bracelet, use the provided magnetic USB charging cable․ Plug one end into the USB port of a power source and attach the magnetic end to the bracelet’s charging interface․ The LED indicator will turn red during charging and blue when fully charged․ Charge for 1-2 hours for a full battery․ Avoid using the bracelet while charging․ For optimal performance, charge the device every 3-4 months if not in use․ Always use the original cable to ensure safety and proper charging․ The smart bracelet is compatible with Android 4․4 or above and iOS 8․0 or higher․ Ensure your device supports Bluetooth 4․0 for seamless connectivity and optimal performance․ The smart bracelet is designed to work seamlessly with both Android and iOS devices․ For Android users, ensure your device runs on Android 4․4 or later․ iOS users require iOS 8․0 or above․ These operating systems support the necessary features and apps for optimal performance․ Download the compatible app from the Google Play Store or Apple App Store to pair your bracelet․ Proper OS compatibility ensures smooth connectivity and functionality․ Your smart bracelet requires a stable Bluetooth connection to function properly with your smartphone․ Ensure your device supports Bluetooth 4․0 or higher for reliable pairing․ Enable Bluetooth in your phone’s settings and confirm it is visible to nearby devices․ A strong connection ensures seamless data syncing, notifications, and app control․ Keep your phone within range to maintain connectivity and enjoy uninterrupted use of your bracelet’s features․ Charge the bracelet, then press and hold the touchpoint for 3 seconds to power it on․ Enable Bluetooth on your phone, search for the device, and pair it to sync features․ To pair your smart bracelet with your smartphone, ensure it is fully charged and turned on․ Download and install the compatible app (e․g․, Happy Sport or Dafit) from the App Store or Google Play․ Open the app, create an account, and enable Bluetooth on your phone․ Search for the bracelet in the app’s device list, select it, and confirm the pairing request․ Once connected, the bracelet will sync time, date, and other settings automatically․ This setup allows you to track activities, receive notifications, and access all features seamlessly․ To sync the time and date on your smart bracelet, ensure it is paired with your smartphone via Bluetooth․ The device will automatically synchronize with your phone’s time and date settings․ If manual syncing is needed, open the app, go to settings, and refresh the data․ This ensures accurate activity tracking and notifications․ Note: Automatic syncing occurs during initial pairing and periodically thereafter․ Learn to navigate your smart bracelet with touch and gesture controls․ Swipe, tap, or press to access features, track activities, and customize settings effortlessly․ Your smart bracelet operates seamlessly with intuitive touch and gesture controls․ Swipe left or right to navigate through menus, and tap to select options․ Double-tap to return to the home screen or access the main menu․ Press and hold the touchscreen for 3 seconds to wake the device or activate specific features․ Gesture controls, like raising your wrist, can be enabled to view notifications or time․ Customize these settings in the companion app for a personalized experience․ Ensure the screen is clean for accurate touch responses and smooth navigation․ The smart bracelet offers advanced health monitoring, including heart rate and sleep tracking, alongside step counting and calorie tracking for comprehensive fitness insights․ The smart bracelet accurately tracks your daily steps, distance, and calories burned․ It monitors various activities like walking, running, and cycling, providing detailed reports․ The device automatically detects exercise modes and records data, syncing seamlessly with your smartphone app․ Set daily goals and receive reminders to stay active․ Customize settings to track specific workouts and view progress over time, helping you stay motivated and achieve fitness milestones effectively․ The smart bracelet continuously monitors your heart rate throughout the day, providing real-time data and alerts for abnormal readings․ It also tracks your sleep patterns, including light, deep, and REM stages, offering insights to improve sleep quality․ The device syncs this data with your smartphone app, allowing you to view detailed reports and trends․ Enable notifications for heart rate alerts and sleep summaries to stay informed about your health and wellness․ Regular monitoring helps you make informed lifestyle adjustments for better overall well-being․ Regularly charge the bracelet and update its software for optimal performance․ Restart the device or re-pair it with your smartphone to resolve connectivity or sensor issues․ Charge the smart bracelet regularly to ensure continuous operation․ Use the provided USB cable or magnetic charger, and avoid overcharging to prolong battery life․ For optimal performance, update the software via the app whenever new versions are available․ Regular updates enhance functionality, fix bugs, and improve compatibility․ If the device is idle, charge it every three months to maintain battery health․ Clean the bracelet periodically with a soft cloth to prevent dust buildup․ Always refer to the manual for specific charging and update instructions tailored to your model․ If the smart bracelet won’t turn on, ensure it’s fully charged or try pressing and holding the touchpoint for 3 seconds․ For connectivity issues, restart both the bracelet and smartphone, or unpair and re-pair the device․ If data syncing fails, manually sync through the app or reset the bracelet․ Clear the app cache or update the software if functionality issues arise․ For persistent problems, refer to the troubleshooting section in the manual or contact customer support for assistance․ Regular updates and proper maintenance can help prevent many common issues․ With this manual, you’re now equipped to maximize your smart bracelet’s potential․ From initial setup to daily use, you’ve learned how to navigate features, troubleshoot, and maintain your device․ Remember to regularly update software and charge your bracelet to ensure optimal performance․ If questions arise, revisit this guide or contact support․ Enjoy the convenience, health insights, and style your smart bracelet offers․ Happy tracking and stay connected!Charging the Smart Bracelet

Compatibility Requirements
Compatible Operating Systems (Android and iOS)
Bluetooth Connectivity Requirements

How to Turn On and Pair the Smart Bracelet
First-Time Pairing with Your Smartphone
Syncing Time and Date
Basic Operations and Navigation
Using Touch and Gesture Controls
Key Features of the Smart Bracelet
Step Counting and Activity Tracking
Heart Rate and Sleep Monitoring
Maintenance and Troubleshooting
Regular Charging and Update Tips
Resolving Common Issues